Want an easy, money-saving way to upgrade your old fluorescent lights? Bypassing the ballast when installing LED tubes is one of the best ways to do it!
If you’re tired of high energy bills and constant bulb replacements, switching to ballast bypass LED tubes is a smart move. They use way less electricity, last years longer, and give you better light—if installed the right way.
The best part? You can install them yourself—no need to call an electrician! This guide will walk you through the process step by step, using easy-to-follow instructions. Even if you’re not a wiring expert, you’ll have your new LED tubes up and running in no time.
Ready to make the switch? Let’s get started!
Why May You Want to Wire Ballast Bypass LED Tube?
1 . To Save Money on Energy Costs
LED tubes are game-changers when it comes to efficiency—they use up to 80% less energy than those old flickering fluorescent lights you’re probably used to. Since they require way less power to produce the same (or better) brightness, you’ll notice the difference on your energy bill month after month. Over time, those savings really add up, making LED tubes one of the smartest long-term upgrades you can make for your home or business lighting.
2 . To Improve the Quality of Your Lighting
You’ll immediately notice the difference with LED tubes – they provide a clear, steady light that’s far superior to the harsh glare or dull flicker of old fluorescent bulbs. Everything in your space will look more vibrant as these lights render colors more accurately, reducing that washed-out look you get with traditional lighting. What’s really impressive is their lifespan – where standard fluorescent tubes might need replacing every year or two, quality LED tubes can keep working beautifully for a decade or more before needing replacement.
3 . To Increase Your Safety
Unlike old fluorescent lights that often flicker and buzz, LED tubes provide steady, consistent light without the annoying fluctuations. This smooth operation means they don’t interfere with sensitive electronics like computers or medical equipment. Plus, the stable lighting is easier on your eyes – no more headaches or strain after long hours under harsh lights.
How to Wire Ballast Bypass LED Tube in 5 Easy Steps
Don’t worry – wiring LED tubes without a ballast is actually pretty simple! As long as you’re comfortable with basic wiring and follow standard safety steps, you can handle this upgrade yourself. Let’s break it down into 5 easy-to-follow steps:
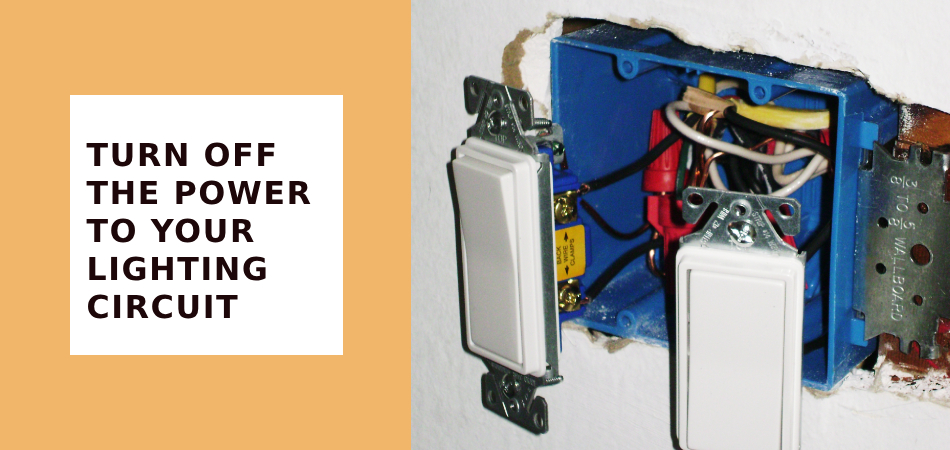
Step 1: Turn Off Your Lighting Circuit
First things first – before touching any wires, you’ll want to cut power to the lights at your circuit breaker. I know it might seem obvious, but it’s the golden rule of electrical work: no exceptions. Even though this is a relatively simple job, working on live wires is never worth the risk. Take the extra minute to flip that breaker – your safety comes first!
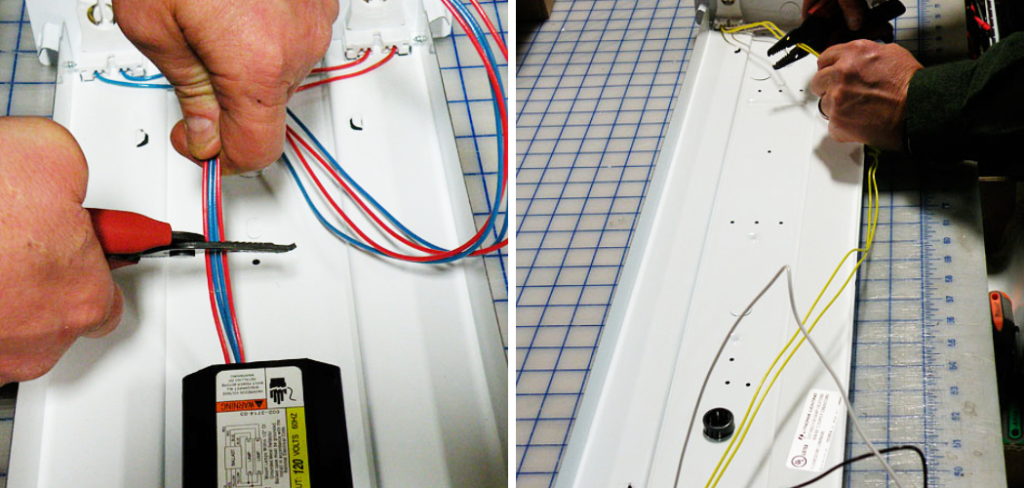
Step 2: Remove Your Old Ballast
With the power safely off, you can now remove the old ballast from the fixture. Carefully disconnect the wires—taking a quick photo or labeling them with tape can save you headaches later if you ever need to reinstall it. Keep the wiring neat and organized so nothing gets mixed up.
Step 3: Install Your New Ballast Bypass LED Tube
Now that the old ballast is gone, let’s get your new LED tube ready. Gently push the tube’s metal pins into the fixture’s sockets—they should click into place easily. Then, match the wire colors (usually black to black, white to white) and twist them together with wire nuts. A quick tug test ensures they’re secure!
Step 4: Turn on Your Power Source
Before you flip the power back on, double-check every connection. Give each wire nut a gentle twist to confirm it’s snug, and tuck any loose wires neatly into the fixture. When you’re confident everything’s secure, head to your breaker box and turn the power back on. Stand back for a second when you first test the light—just to make sure everything works smoothly with no sparks or flickering.
Step 5: Test Your New Ballast Bypass LED Tube
Turn on the power and watch your new LED tube light up. You’re looking for instant, steady brightness without any flickering or strange noises. If anything seems off – like sparks, buzzing, or dim lighting – don’t worry. Just turn the power back off right away and go back to check your wire connections. Make sure everything is properly matched up and secured before trying again.
Some Extra Tips to Wire Ballast Bypass LED Tube
1 . Use High-Quality Copper Wire
When wiring your LED tubes, always opt for high-quality copper wire—it’s the best choice for this job. Here’s why:
Skip the bargain-bin wires—spending a little more on copper now prevents problems later.
2 . Use a Resistor for Additional Safety
You can add a simple safety device called a resistor when wiring your LED tubes. Think of it like a speed bump for electricity – it helps slow down any sudden power spikes that could damage your lights. Just make sure to get one that’s the right strength for your particular LED tubes, and it’ll keep everything running safely for years.
3 . Practice Good Wiring Techniques
You can add a simple safety device called a resistor when wiring your LED tubes. Think of it like a speed bump for electricity – it helps slow down any sudden power spikes that could damage your lights. Just make sure to get one that’s the right strength for your particular LED tubes, and it’ll keep everything running safely for years.
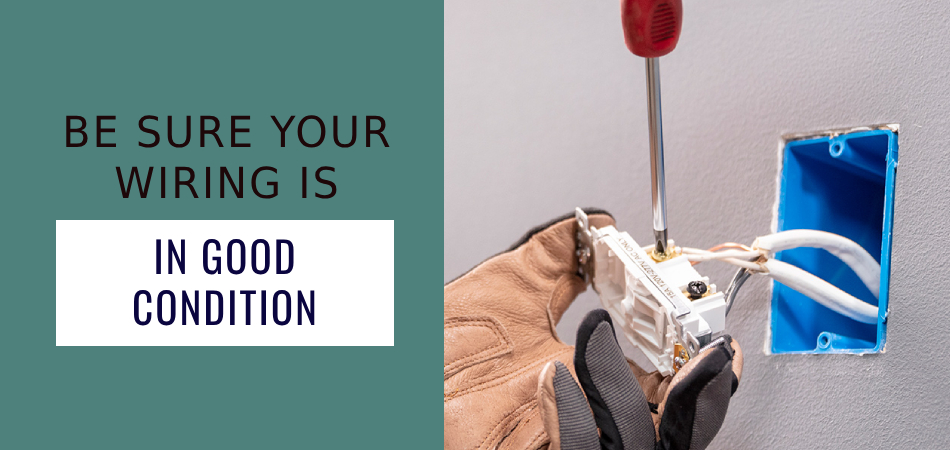
4 . Perform Routine Inspections
Just like you’d check your car’s oil or your home’s smoke detectors, it’s smart to give your LED tube wiring a quick check-up every now and then. Look for any loose wires, cracked insulation, or signs of overheating. A simple once-over can catch small problems before they turn into bigger ones, keeping your lights working safely for years to come. Think of it as preventive maintenance that takes just minutes but saves you headaches down the road.
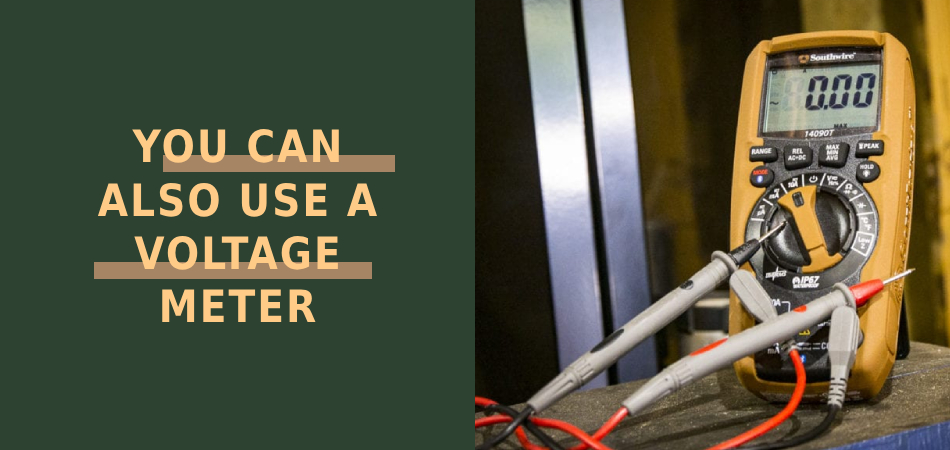
5 . Use an Electrical Tester
Before you flip the switch, use a voltage tester (that little pen-shaped tool that lights up) to check your wiring. Just touch it to the wires to make sure:
It’s like a final quality check that takes seconds but can prevent sparks or shorts. Most testers are inexpensive and available at any hardware store – well worth having for DIY electrical projects.
6 . Seek Professional Assistance
Not feeling confident about the wiring? No shame in calling a pro! A licensed electrician can handle the installation in no time, making sure everything’s safe and up to code. Plus, they can give you bonus tips on getting the most out of your new LED lights—like ideal placement or dimmer compatibility. Better safe than sorry when it comes to electrical work!
Frequently Asked Questions
What If I Have An Older Ballast?
If your light has an older ballast, you might need a special “ballast bypass” LED tube. This lets you skip the old ballast and wire the LED tube straight to the power. Some older ballasts don’t work well with new LED tubes, so it’s best to check first.
Do I Need Any Special Tools To Wire A Ballast Bypass LED Tube?
Good news—you don’t need any fancy tools! Just your current wiring and maybe a few basic connectors (like wire nuts). Some LED tubes even include step-by-step instructions, so you’ll know exactly how to connect everything safely.
How Can I Test If My Ballast Bypass LED Tube Is Working Properly?
Once everything’s wired up, just flip the switch—if the light turns on, you’re good to go! It’s also smart to double-check that your LED tube’s wattage matches your wiring. For extra peace of mind, a voltage meter can confirm the power running to the tube is safe (but this step is totally optional).
How Long Should A Ballast Bypass LED Tube Last?
How long do these LED tubes last? Well, it depends on the brand and quality, but most ballast bypass LED tubes outlive old fluorescent bulbs by a huge margin. We’re talking 50,000 hours or more for good models – that’s years of reliable light! Plus, since they sip electricity instead of guzzling it, you’ll see the savings add up on your power bill over time.
What Are The Benefits Of Using A Ballast Bypass LED Tube?
What Are The Disadvantages Of Using A Ballast Bypass LED Tube?
The only real downside is the upfront cost—LED tubes can be more expensive at first. But since they last longer and save energy, they’re cheaper in the long run.
Conclusion
Wiring a ballast bypass LED tube is pretty easy if you know basic electrical work. Just follow the steps, and you’ll have a bright, energy-saving light in no time. And don’t forget to throw away the old ballast properly—it’s better for the environment!
Switching to LED might seem like a big job, but it’s worth it. You’ll save money, use less energy, and enjoy better lighting for years.